Traveling with a compact brew setup can keep mornings smooth without taking over limited counter space. This short intro outlines practical storage choices and smart machine picks that make a difference on the road.
Many travelers choose the Bella single serve machines because they lack a large water reservoir. That design reduces mold risk and saves valuable kitchen area in a camper or small trailer.
Keeping grounds, pods and cups tidy helps the whole kitchen stay functional. Efficient storage and thoughtful construction protect the machine and speed the brewing process.
Readers will learn options that balance water and power needs with portability. The guide also notes that affiliate links may appear and the site earns a small commission to support future camping gear tests.
Understanding the Challenges of RV Coffee Storage
Road travel exposes mobile kitchens to constant shocks that can break poorly built brewing gear. This section outlines the two biggest threats that affect safe storage and reliable brewing while on the move.
Vibration and Road Hazards
Highway vibration will loosen adhesive mounts and rattle cheap plastic components loose. Over hours of driving, holders that rely only on glue often work themselves free.
Loose machines or mounts can spill grounds, water, and cups, creating messes and possible electrical issues. A secure mounting strategy is essential to keep a cup ready at the next stop.
Temperature Fluctuations
Interior temps in a camper can climb past 100°F in summer and drop below freezing at night. These swings stress seals, water reservoirs, and brittle parts on many home-style coffee makers.
Durability matters: materials that survive heat and cold, and mounts that resist adhesive failure, reduce the chance of stress fractures and ruined equipment.
- Test mounts and machines against vibration and temp changes before long trips.
- Plan water and power use to ensure a reliable cup without surprises.
- Choose materials and mounting hardware built to handle travel life.
Essential Coffee Pod Organization for RV Kitchens
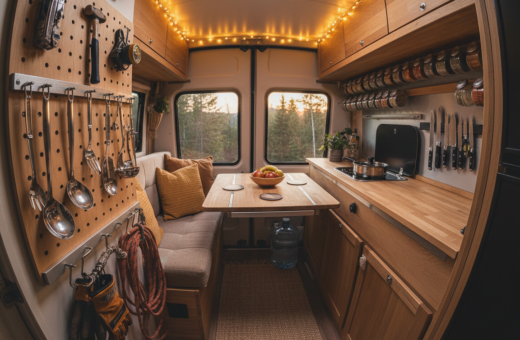
A tidy camper kitchen makes morning brewing fast and stress-free. Starting with a clear plan helps the user keep machines and supplies ready without crowding counter space.
Use the underside of a cabinet to mount a secure holder. This frees the top of the counter and keeps pods within reach during a busy morning.
Reserve a cabinet shelf for grounds, filters, and cups. A single dedicated spot for the coffee pot and machine makes it easier to prepare a fresh cup coffee and limits the chance of spills while in transit.
Manage the water reservoir by refilling only what is needed and drying the tank between trips. Proper water care reduces mold risk and keeps the machine ready to serve coffee when needed.
- Secure pod holders prevent loose grounds and messy cabinets.
- Choose a small, single serve machine if space is tight.
- Label shelves so everyone on a trip can find cups and supplies fast.
Why Steel Construction Outperforms Plastic
A steel rack will outlast plastic when motion and heat become routine on the road. Picked parts that resist flex and fatigue reduce failures during long trips. This matters when mounts must hold a machine and a cup steady through hours of driving.
Durability Under Stress
The Coffee Keepers Under Cabinet K Cup Holder uses steel construction to survive temperature swings and vibration. Unlike plastic, steel does not suffer flex-fatigue when a camper crosses rough terrain.
Steel stays tough as temperatures climb and fall, so brittle cracks and sudden breaks are far less common. That stability keeps the water reservoir and coffee grounds contained and accessible.
- Steel prevents repeated replacement and saves time and money.
- A solid steel holder keeps the coffee pot and machine secure on bumpy roads.
- Mounts built from metal handle the power and heat of daily use better than many plastic options.
For readers weighing options, durable construction is the most important choice. Learn about top rated equipment and pairing recommendations at best camping coffee.
Selecting the Right Mounting Hardware
Choosing the right fasteners makes the difference between a stable brew setup and a rolling mess on the highway.
Use self-tapping screws and metal brackets to lock mounts to the underside of a cabinet. Screws bite into wood or plywood and keep a coffee pot and machine steady during bumps.
Avoid relying only on adhesive. Glue and tape often fail under heat and vibration. That leaves coffee grounds, water reservoir leaks, and a damaged machine to clean up at the next stop.
Pick hardware designed for life on wheels. Marine- or trailer-grade screws and small steel brackets resist temperature swings and vibration better than general-purpose fasteners.
- Attach holders to cabinet framing, not thin paneling.
- Test the mount with weight and road vibration before packing cups and water.
- Opt for removable screws if renters need to return the space unchanged.
With the right screws and careful installation, an RVer can trust their setup and enjoy a hot cup without mid-trip failures.
Preparing Your Cabinet for Installation
Preparing the underside of a cabinet started with a simple cleaning ritual and precise measuring. This short prep reduces failures and saves time during a trip.
Cleaning for Adhesion
Remove dust and grease by wiping the cabinet underside twice with isopropyl alcohol on a microfiber cloth. Two passes ensured the adhesive had a strong surface to bond.
A clean surface mattered because trapped grease or fibers caused mounts to release when vibration was present. Dry the area fully before testing fit.
Locating the Ideal Spot
Measure the planned area and check door swing so the rack would not hit a cup or pot when opened. Verify slide-out clearance and that a machine could sit without rubbing the cabinet face.
- Test placement before driving screws into cabinets.
- Ensure the door opens fully without catching the rack.
- Account for water access and space to lift a cup under the holder.
Final check: test the mount under gentle vibration and adjust if needed. Proper preparation kept coffee grounds, cups, and gear secure for the entire journey.
Step by Step Installation for Secure Travel
Begin installation on level ground so the rack sits true and the mount holes align precisely.
Position and mark: Apply the adhesive strips to hold the rack in place. Verify the rack clears the cabinet doors and leaves space to lift a cup beneath the machine.
Screw placement: Drive all four self-tapping screws using a regular screwdriver. This avoids overdriving into thin wood and reduces split or stripped holes.
Load test: Place a full load of 24 cups and shake the cabinet gently. Confirm the rack holds pods, cups, and coffee grounds without movement.
“Check screw tightness after the first long trip—vibration can loosen fasteners.”
Final checks: Re-check screws after the initial travel day. If any backing off is found, tighten by hand and inspect the steel construction and bracket alignment.
- Park level and set the rack position.
- Use adhesive then hand-drive four screws.
- Test with full load and re-tighten after travel.
Optimizing Your Coffee Workflow in Small Spaces
Designing a repeatable workflow makes every cup faster and reduces prep time on the road. A clear layout helps a two-person household move from wake-up to a hot cup with minimal fuss.
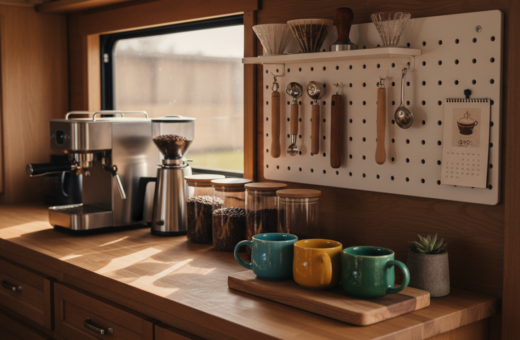
Store a 24-count rack on the cabinet door above the sink to keep counter space clear and maintain a minimalist look in the kitchen. Keep a sealed sleeve in a pantry container as a backup to cover a dozen days of travel.
Place the coffee pot and single serve machine within easy reach so filling the water reservoir and dropping in a pod is a one-handed task. This set-up speeds morning routines and lowers the chance of spills in a small space.
- Keep coffee grounds and pods separated and labeled to avoid mix-ups.
- Store the machine near the sink to make refills and rinses quick.
- Reserve a small cabinet shelf for filters, cups, and a spare sleeve.
Final tip: arrange items by use frequency. The most-used cup and the current rack should be the easiest to reach, so every morning runs smoothly and each cup coffee is served with less time and stress.
Conclusion
Smart installation and durable materials make travel brewing dependable day after day.
Choose steel racks and screw mounts to keep gear steady during long drives. Test the install under load and after the first trip.
Clean surfaces before mounting and dry reservoirs between uses to prevent mold and leaks. Simple prep saves messy repairs later.
A tidy workflow speeds mornings and keeps a small kitchen usable. Store the most-used items within reach and label shelves clearly.
Please note this post contains affiliate links, and the site earns a small commission on purchases to support future gear testing.